Getting started with EM
Using the EM language and its runtime requires a cross-development environment, in which hosted tooling will build / load executable EM programs onto target hardware. For the host, you'll use a PC running Windows, Linux, or MacOS(1); for the target, you can choose any MCU board for which an em$distro package already exists.
- MacOS support coming in 1Q24
Before turning to the EM SDK (described next), you should first install / upgrade the following tooling environments on your host PC:
| Node.js | version 16.3.0 or later | execute node --version to verify |
| VS Code | version 1.80.0 or later | execute code --version to verify |
If you don't already have a recent version of the Git Bash shell, you should also install Git for Windows. To verify your setup, ensure that the node and code commands from the previous table operate correctly under Git Bash.
Do not proceed forward if these verification checks should fail !!!
Software development kit
The EM SDK comprises two distinct components:
a VS Code extension named EM Builder with which you'll interact directly; and
a special ~/em-sdk folder automatically managed by , which you can largely ignore.
Under the ~/em-sdk folder you'll find a sub-folder named tools, which will contain C/C++ compilers as well as emulation utilities – all used internally by EM to build / load executable target programs. Already found in a well-known place on your PC, EM requires no further action on your part to setup these tools.
Additional artifacts
Looking inside your ~/em-sdk folder, you'll also find some package*.json files as well as a node_modules sub-folder – characteristic of an npm package. Unless instructed otherwise, please leave these (and any other !! ) artifacts housed in ~/em-sdk undisturbed.
Unless instructed otherwise, do NOT disturb the contents of your ~/em-sdk folder !!!
Target MCU hardware
The EM SDK will contain all of the tools required to build / load EM programs targeting any of the following boards; you won't need to download any additional, vendor-specific software. While we encourage you to purchase one (or more) of these boards, you can still learn a great deal about EM without target hardware – by taking the **FAST-TRACK** option.
The Texas Instruments CC2340R5 wireless MCU features an Arm Cortex-M0+ CPU together with a familiar suite of peripherals – including a generic 2.4 GHz radio with BLE 5.x support. Texas Instruments also offers an inexpensive LP-EM-CC2340R5 evaluation board in their familiar LaunchPad format – available from TI as well as their distributors.
You should also purchase this emulator board from TI – unless you already own a "classic" TI LaunchPad with on-board XDS110 support. In that case, you can easily connect this legacy LP to your new LP-EM-CC2340R5 board using a cable supplied by TI. If you haven't used an XDS110 before, run the one_time_setup script found in ~/em-sdk/tools/ti-uniflash.
The ti.cc23xx distro supports the following Setups for the EM-SDK tools:
ti.cc23xx/gcc |
GCC 10.3, optimized for space |
ti.cc23xx/gcc_sram |
GCC 10.3, optimized for space, code + consts in SRAM |
ti.cc23xx/segger |
CLANG / LLVM 14.0, optimized for space |
ti.cc23xx/segger_sram |
CLANG / LLVM 14.0, optimized for space, code + consts in SRAM |
ti.cc23xx/default |
== ti.cc23xx/segger |
TBD – open for suggestions
TBD – open for suggestions
Nothing to buy, of course !!! You can still build executable programs using any em$distro package within the EM SDK; you just can't load these programs onto target hardware.
Familiarize yourself, however, with the Setups available for one (or more) of the other hardware tracks enumerated above.
As we pivot to installing EM Builder, we'll soon illustrate how to select one of the Setups associated with the distros supporting these hardware options.
EM Builder extension
At this stage, we can launch VS Code and install its EM Builder extension. To begin, first create an empty folder anywhere on your PC (outside of ~/em-sdk); this folder will serve as your initial VS Code workspace.
Next, enter the command code workspace to launch VS Code (where workspace represents a path to the folder created above). Unless you've already installed EM Builder, you'll see something like the default Welcome layout shown within the following screen capture:

The installation process actually begins by importing a VS Code profile named EM, which will configure a variety of user-settings as well as download the latest (stable) version of the EM Builder extension and its dependencies. To illustrate the process, watch the Importing EM Profile animation above by clicking the button atop this screen capture.
As seen in the animation, you'll use a special URL generated by VS Code to fetch the EM profile from the cloud. When ready, copy this URL to your clipboard and follow the same steps [ Profiles > Import Profiles... ] within your own installation of VS Code – pasting this URL into the input box.
If necessary, you can rewind the animation by clicking the button whenever it appears atop the screen capture. Hint – once playing, you should click on the animation itself to enlarge the view.
With the EM profile in place, we'll now activate the EM Builder extension for the first time as illustrated in the following animation:

The [ Command Palette > Reload Window ] sequence effectively restarts VS Code which in turn will activate EM Builder. Always checking the status of the ~/em-sdk folder, the extension will prompt you to install the EM SDK components whenever absent or outdated.(1)
- Things will go faster the next time you'll launch VS Code.
The EM Builder extension also requires that you select one of the Setups supported by your target MCU hardware, as the following animation will illustrate:
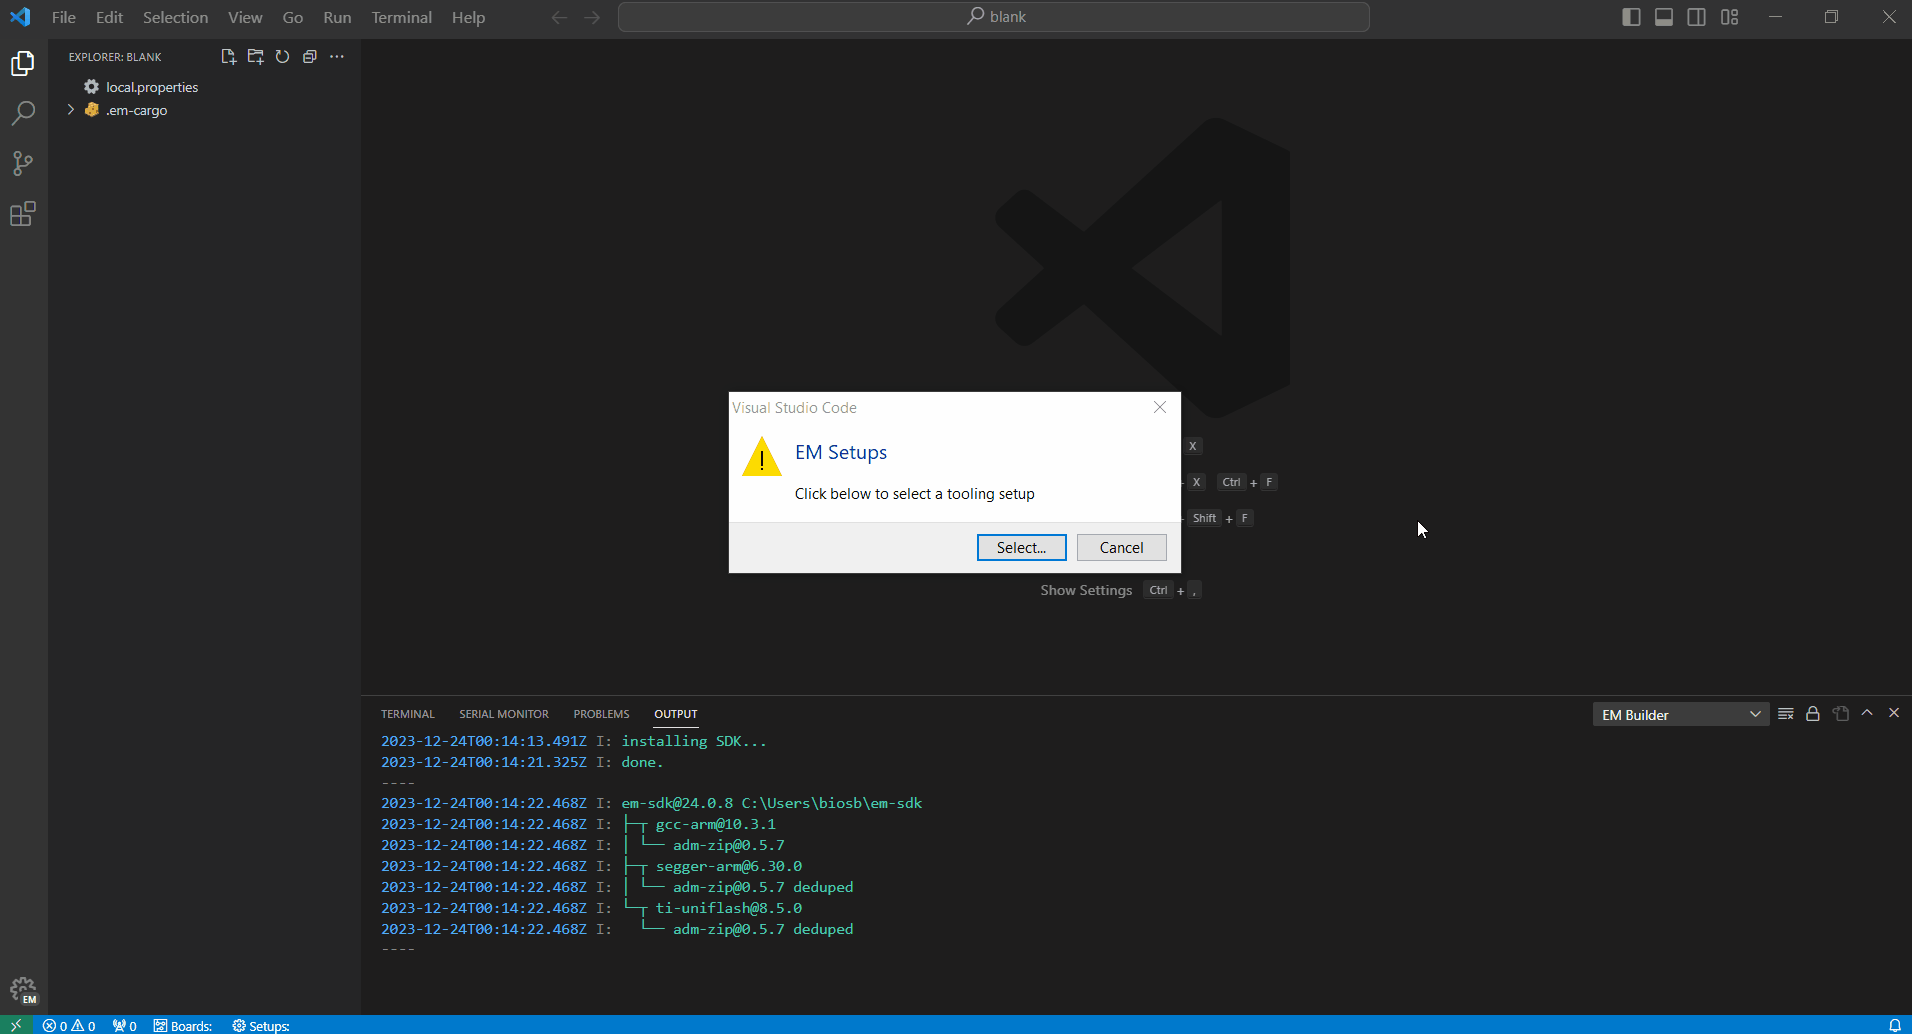

You should select a "default" configuration when the EM Setup dropdown appears – even if you've chosen the ** FAST-TRACK ** option for your target MCU hardware. Note that this process implicitly binds a default target board associated with your selection.
If you do plan to connect a target board, you'll also need to assign an appropriate value to the ConsolePort parameter found in the workspace local.properties file as follows:
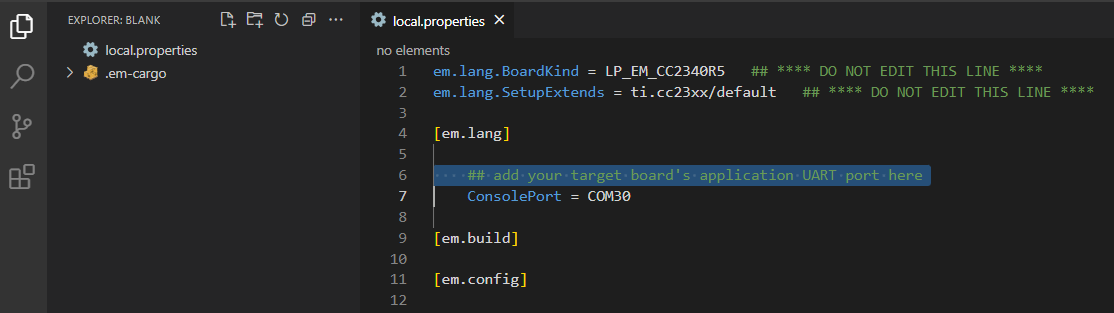
Finding the actual value for the ConsolePort parameter depends, of course, on utilities specific to your PC's operating system as well as some help from your board's documentation.
In summary:
enter code workspace from the shell to launch VS Code |
| execute the Profiles > Import Profiles... command sequence |
| paste the special URL given above into the input box |
| select Create Profile and then Create when prompted |
| execute the Developer: Reload Window command |
| select Install... if prompted to install EM SDK components |
| select Select... if prompted to bind EM Setups |
| choose a "default" configuration from the EM Setup dropdown |
update the ConsolePort parameter in local.properties as appropriate |
Ready, Set, Go !!!
With everything in place, the time has come to start Using EM .Happy coding !!! 
